 Walk up
 Chapter 9
The Tower's Secret
 Mystery Solved
The Tower Key
 Journal Entry
The Path Opens
 Walk up into the entrance
 Examine the bottom right side of the moss to the right
of the door for a hint coin
 Enter the door
(must have solved at least 75 puzzles)
 Check out at the floor beside the wall to the right
of the name board for a hint coin
 Look at the notebook on the table to the right
 Go left
 Mystery Solved
Dropped Cogs
 Mystery Solved
Village Disappearances
 Journal Entry
Climbing the Tower
 Check out the top of the drums on the left for a hint coin
 Examine the lock on the bars to the left
Puzzle 094


Hint 1

Hint 2

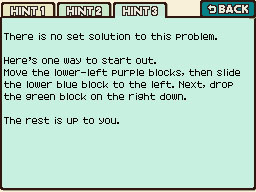
Hint 3

Solution

 See the Step By Step Solution
Step By Step Solution
 Move the left purple block down
 Move the second to left purple block left
 Move the bottom blue block left
 Move the right green block down
 Move the right purple block down
 Move the top purple block right and down
 Move the top blue block right
 Move the orb down and right
 Move the left green block up
 Move the yellow block left
 Move the top purple block left and down
 Move the top blue block down
 Move the orb right and up
 Move the top blue block up and left
 Move the orb down and left
 Move the right purple block all the way up
 Move the orb right and down
 Move the second to right purple block up
 Move the orb left
 Move the right green block all the way up
 Move the orb to the exit
Progress
 3815 Picarats and 192 Hint Coins (US)
3845 Picarats and 192 Hint Coins (UK)
105 Rolling a Three
No comments:
Post a Comment